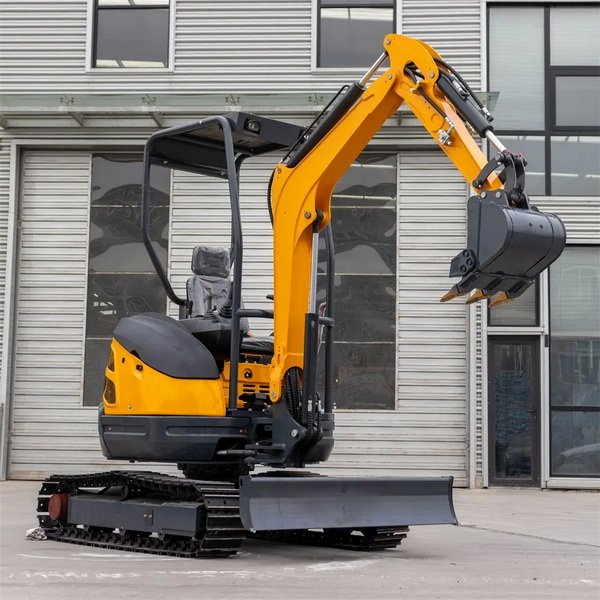
How to Transport a Compact Mini Excavator Safely in 2026
Content Menu
● Step 1: Choose the Right Transport Vehicle
>> Understand key weight ratings
>> Match trailer type to machine
>> Check legal length, width, height, and permits
● Step 2: Prepare the Site and Equipment
>> Pre-transport checks for the machine
>> Pre-transport checks for the trailer and tow vehicle
>> Prepare a safe loading area
● Step 3: Load the Machine Safely
>> Loading procedure for a compact mini excavator
>> Positioning multiple machines
● Step 4: Secure the Machine for Transport
>> Tie-down requirements and basic rules
>> Best practices by equipment type
>> Inspect tie-downs and attachments
● Step 5: Route Planning and On-Road Best Practices
>> Plan a transport-friendly route
>> Operate conservatively on the road
● Case Study Insights: Common Mistakes to Avoid
● Applying These Principles to Other Certeg Machines
● Conclusion: Turn Transport Into a Competitive Advantage
● FAQs: Compact Excavator and Equipment Transport
>> Q1: What size trailer do I need for a mini excavator?
>> Q2: Can I use the same trailer for a mini excavator and a skid steer?
>> Q3: How many tie-downs should I use for compact equipment?
>> Q4: Do I always need permits for transporting an excavator?
>> Q5: How often should I inspect securement during transport?
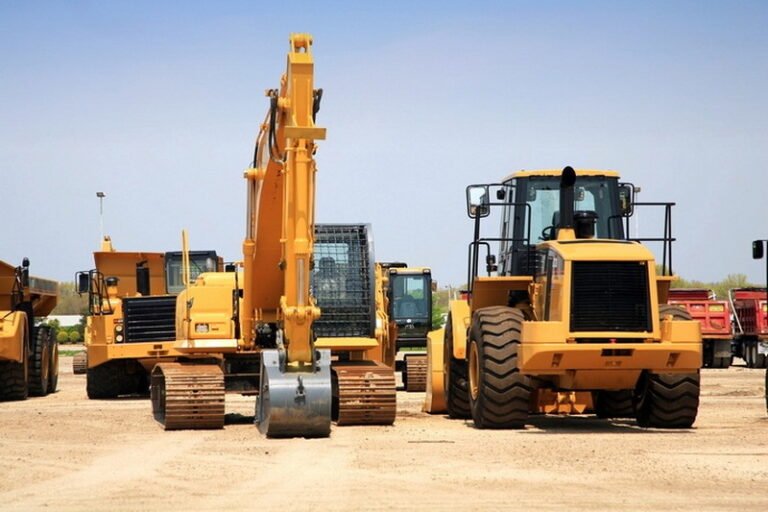
Transporting a compact mini excavator from your yard to the jobsite looks simple, but every move involves real risk. A single mistake in loading, securing, or route planning can damage equipment, cause injuries, or trigger costly delays and fines.
For contractors and fleet owners using compact excavators, skid steer loaders, rollers, forklifts, tractors, and track carriers, this guide explains a complete, step-by-step process to transport your machines safely and efficiently. By refining your transport routine and standardizing it across your fleet, you protect your people, your assets, and your reputation.
Why Safe Transport Matters
Safe transport is not just a compliance requirement; it is a core part of your risk management strategy. Heavy machines are complex and expensive, and many projects depend on a single excavator or loader being ready on time at the next job.
When loading and transport go wrong, the impacts include:
– Injuries to operators, drivers, or nearby workers.
– Damage to booms, undercarriages, hydraulics, and trailers.
– Schedule disruptions, missed deadlines, and liquidated damages.
– Fines, citations, and higher insurance premiums.
As a manufacturer, Certeg designs excavators, skid steers, rollers, forklifts, tractors, and track carriers with clearly marked tie-down points, low centers of gravity, and transport-friendly layouts. However, even the most transport-ready machine becomes a liability if the trailer, tow vehicle, or securement process is not up to standard.
Step 1: Choose the Right Transport Vehicle
Before you even touch the ramps, match your trailer and towing vehicle to the machine’s weight, size, and attachments. This is the foundation of safe transport.
Understand key weight ratings
To select the right combination, focus on three values:
– Gross Vehicle Weight Rating (GVWR): Maximum safe weight for the loaded trailer, including machine, attachments, and any extra gear.
– Gross Axle Weight Rating (GAWR): Maximum safe load for each axle.
– Tow vehicle rating: Maximum load your truck or tractor unit can safely pull and support on the hitch.
Example: A 6 ton mini excavator with bucket and a hydraulic breaker can easily reach or exceed 13,000 lb operating weight. If the trailer weighs around 4,000 lb, total loaded weight will be about 17,000 lb. In that case you need:
– A trailer with at least 18,000 lb GVWR.
– A tow vehicle rated above that total, with adequate rear-axle and hitch capacity.
Selecting a trailer or tow vehicle below these ratings creates a high risk of suspension damage, brake failures, and loss of control.
Match trailer type to machine
Different machines demand different trailer configurations. Typical choices include:
– Mini excavators (3–8 ton): Tandem-axle flatbed or utility trailer with integrated or detachable ramps and a GVWR in the 10,000–20,000 lb range.
– Skid steer loaders: Gravity-tilt or hydraulic tilt trailers with low decks and strong, non-slip surfaces.
– Rollers and compactors: Low-profile step decks or lowboys that provide enough clearance and stability for the drums.
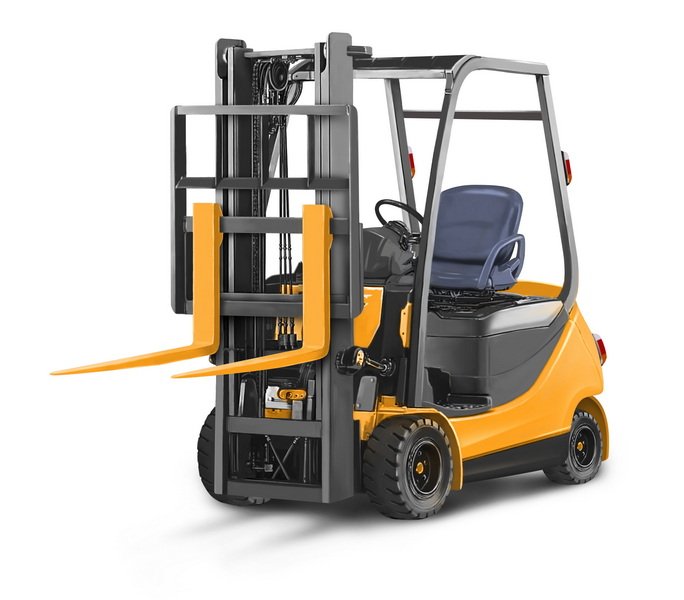
– Forklifts: Flatbeds or step decks with a low approach angle and robust anchor points, suitable for four-point securement.
– Tractors and track carriers: Longer flatbeds or multi-axle trailers capable of spreading weight evenly.
Always confirm your machine’s operating weight and transport dimensions in its Operation and Maintenance Manual before choosing the trailer.
Check legal length, width, height, and permits
Most regions follow similar default limits for standard loads:
– Width up to about 2.59 m (8.5 ft).
– Height up to roughly 4.1–4.3 m (13.5–14 ft).
– Overall combination length controlled by state or national rules.
If your excavator, attachments, or combination of machines exceeds those limits, you may be operating an oversize or overweight load. In that case you may need:
– Special permits for specified routes and time windows.
– Escort vehicles or additional signage.
– Oversize banners, warning flags, and lights.
Route planning should account for bridges, tunnels, low power lines, and restricted roads. This becomes even more important if you are crossing borders or operating under multiple regulatory frameworks.
Step 2: Prepare the Site and Equipment
Thorough preparation prevents most loading incidents. Standardizing pre-transport checks across your fleet will quickly improve safety and consistency.
Pre-transport checks for the machine
Before loading, complete a short but disciplined checklist:
– Shut down and secure the machine, following the manufacturer’s procedure.
– Inspect the undercarriage or tires for visible damage, excessive wear, or debris.
– Check for hydraulic, fuel, or oil leaks.
– Lower the boom and bucket fully and engage any swing or slew locks.
– For skid steers, rollers, and forklifts, lower attachments or forks to the lowest safe position.
– Remove loose items from the cab, steps, and track area.
For machines with hydraulic attachments, ensure hoses are routed in a way that keeps them away from pinch points and tie-down locations. Good preparation here reduces risk of leaks, hose damage, and unexpected machine movement on the trailer.
Pre-transport checks for the trailer and tow vehicle
On the trailer and truck side, confirm:
– Trailer is parked on firm, level ground.
– Parking brake is engaged and wheels are chocked.
– Hitch is locked, safety chains are crossed under the tongue, and jack stands are retracted or correctly supporting parked loads.
– Trailer deck is free of mud, oil, ice, or debris.
– Tires, rims, and suspension components show no visible damage.
– All lights and signals operate correctly.
A surprisingly high number of loading accidents start with trailers that roll, tilt, or twist because they were not correctly secured or the ground was unstable.
Prepare a safe loading area
Your loading zone should be:
– Flat and stable, with enough space for straight-line approach and exit.
– Free of pedestrians, parked vehicles, and loose materials.
– Clearly defined with cones, barriers, or tape if working in a busy yard or jobsite.
– Adequately lit if you plan to load at dawn, dusk, or night.
Whenever the operator’s visibility is restricted, assign a trained spotter equipped with a radio or agreed hand signals. The spotter should position themselves where they can see the machine, the ramps, and any obstacles, but remain clear of the machine’s path.
Step 3: Load the Machine Safely
Loading is the phase where operators are most exposed to rollovers, tip-offs, and ramp failures. Taking extra time at this stage pays off.
Select suitable ramps
Steel ramps are generally preferred for compact excavators and other heavy equipment, because they offer higher strength and better durability under repeated loading. Key ramp considerations:
– Length: Longer ramps reduce approach angle and risk of tipping; a common rule is at least two to three times the trailer deck height.
– Width: Ramps should be wider than the machine’s track or tire width to provide safe margins.
– Capacity: Rated for at least 1.5 times the equipment weight to account for dynamic loads.
Before loading:
– Lock ramps securely to the trailer.
– Clear ramps of mud, ice, or sand.
– Confirm that the surface provides enough traction.
Loading procedure for a compact mini excavator
A consistent loading routine might look like this:
1. Set travel speed to low and disengage any auto-idle features that may interfere with smooth control.
2. Align the machine straight with the ramps, keeping tracks or tires centered.
3. Travel slowly up the ramps with the heaviest end leading, typically the boom and attachment end of the excavator.
4. Avoid sudden steering inputs, braking, or acceleration on the ramp.
5. Once fully on the deck, position the machine so that weight is centered over or slightly ahead of the trailer axles.
6. Lower boom and attachment into the manufacturer’s recommended transport position.
Never load diagonally or at sharp angles, as this increases the risk of trailer tipping and uneven weight distribution.
Positioning multiple machines
If you are transporting multiple compact machines on one trailer, such as a mini excavator and a skid steer:
– Load the heavier machine first, generally closer to the front or over the main axles.
– Place lighter machines behind or in front, ensuring an overall 60/40 or 70/30 weight balance between front and rear axles.
– Maintain at least 15–30 cm (6–12 inches) separation between pieces of equipment.
– Ensure no part of any machine extends beyond the side edges of the trailer platform.
Careful positioning not only improves road stability but also makes securement easier and more effective.
Step 4: Secure the Machine for Transport
Once the machine is correctly positioned, you must immobilize it for the road. Proper securement is both a legal and a practical necessity.
Tie-down requirements and basic rules
Typical heavy equipment securement rules include:
– A minimum of four independent tie-downs for many compact machines.
– At least one tie-down per side or per axle for larger equipment.
– Tie-downs with adequate working load limits that match or exceed the machine weight.
– Standardized, manufacturer-specified anchor points on both the machine and trailer.
Use an appropriate combination of:
– High-grade chains, tensioners, and binders, or
– Industrial-quality straps and ratchets, where permitted.
Avoid tying to hydraulic lines, handrails, or other non-structural components that can bend or break under load.
Best practices by equipment type
Different machines have different securement points:
– Mini excavators: Secure at front and rear frame points, and ensure boom and bucket are lowered and locked in place.
– Skid steer loaders: Attach chains or straps to the chassis near the axles; keep loader arms and attachment fully lowered.
– Rollers: Secure via frame near drum axles, ensuring drums are not tied in a way that stresses kingpins.
– Forklifts: Tie down using strong frame points close to the axles; forks should be lowered, slightly tilted, and stabilized.
– Tractors and track carriers: Secure at multiple frame points, with particular care for articulated joints and high-mounted implements.
Regardless of machine type, combine securement with wheel chocks, wedges, or cradles to prevent rolling or sliding.
Inspect tie-downs and attachments
Before departure:
– Inspect every chain, strap, hook, and binder for cracks, stretching, or corrosion.
– Confirm that all tensioners are properly locked and not over-extended.
– Verify that the machine cannot move forward, backward, or sideways.
– If you are carrying separate attachments, secure them individually using chains, straps, or dedicated mounts.
During transport, stop periodically in safe areas to recheck tension, as loads can settle and straps may loosen.
Step 5: Route Planning and On-Road Best Practices
Even a perfectly loaded and secured machine can become a hazard on the wrong route or in the wrong conditions.
Plan a transport-friendly route
When planning your journey:
– Use truck navigation tools or road authority maps to avoid restricted roads and weight-limited bridges.
– Check for low bridges, tunnels, overhead structures, and sharp turns.
– Avoid steep grades or narrow roads whenever possible.
– Account for traffic patterns and scheduling; moving large equipment outside peak hours can significantly reduce risk.
For cross-border or multi-state moves, verify applicable local requirements in advance, including signage, escort vehicles, and lighting rules.
Operate conservatively on the road
Drivers should:
– Accelerate and brake gradually, anticipating traffic and road conditions.
– Take corners slowly to minimize lateral forces on the trailer.
– Keep greater following distance than usual to allow for longer stopping distances.
– Obey all posted limits and special restrictions for heavy vehicles.
If visibility, weather, or road conditions deteriorate, consider postponing or temporarily suspending transport rather than pushing ahead with a marginal safety margin.
Case Study Insights: Common Mistakes to Avoid
Real-world incidents repeatedly highlight the same patterns of error:
– Using undersized trailers for heavier excavators or multiple machines.
– Securing only the front or only the rear of a machine.
– Relying on parking brakes instead of chocks and mechanical restraints.
– Loading on sloped or uneven ground.
– Failing to lower booms, buckets, masts, or forks.
Turning these lessons into internal rules and checklists is a simple way to prevent repeated mistakes and keep your fleet safer.
Applying These Principles to Other Certeg Machines
Although this guide focuses on compact mini excavators, the same principles apply across the Certeg lineup:
– Skid steer loaders: Use low-deck or tilt trailers, lower and secure the attachment, and always apply the parking brake plus chocks.
– Rollers: Ensure drums are not used as anchor points unless the manufacturer specifically allows it; use frame and axle areas instead.
– Forklifts: Lower forks, tilt slightly, chock wheels, and secure at four corners for maximum stability.
– Tractors and track carriers: Treat these like compact excavators, focusing on low center-of-gravity placement and multi-point securement on robust frame structures.
By developing standardized loading and transport procedures for each machine category, you make it easier to train operators and maintain a consistently high safety standard.
Conclusion: Turn Transport Into a Competitive Advantage
Safe, efficient transport is not just a cost; it is a competitive advantage. When your excavators, loaders, rollers, forklifts, tractors, and track carriers arrive on time and in perfect condition, you:
– Protect your investment in equipment.
– Improve jobsite productivity and schedule reliability.
– Reduce incidents, claims, and regulatory pressure.
– Build trust with clients and partners.
For fleets and contractors working with Certeg machines, now is the right moment to:
– Review your current trailers, ramps, and securement equipment.
– Standardize checklists and procedures for each machine type.
– Train operators and drivers using this guide and your equipment manuals.
If you are ready to upgrade your transport capability, contact Certeg to discuss trailers, tie-down solutions, and transport-ready configurations for your next excavator, skid steer, roller, forklift, tractor, or track carrier purchase. Take the next step now and turn every move into a safe, controlled, and professional operation.
Contact us to get more information!
FAQs: Compact Excavator and Equipment Transport
Q1: What size trailer do I need for a mini excavator?
In many cases, a 10–16 ft tandem-axle trailer with a GVWR in the 10,000–20,000 lb range is adequate for compact and mini excavators. Always confirm the machine’s operating weight, the weight of any attachments, and the trailer’s rated capacity before deciding.
Q2: Can I use the same trailer for a mini excavator and a skid steer?
Yes, if the trailer’s GVWR, deck length, and axle ratings exceed the combined weight of both machines and their attachments. Be sure to position the heavier machine near the trailer’s axle group, maintain safe separation between machines, and secure each unit with its own complete set of tie-downs.
Q3: How many tie-downs should I use for compact equipment?
Many compact machines require at least four independent tie-downs as a baseline, with additional securement for attachments or articulated sections. In practice, using four to six chains or straps at manufacturer-approved anchor points is a reliable standard for mini excavators and similar equipment.
Q4: Do I always need permits for transporting an excavator?
You do not always need permits. For standard loads within legal height, width, length, and weight limits, normal registration and compliance are sufficient. However, if your machine or combination exceeds local limits, is unusually tall, wide, or heavy, or uses a special route, you will likely need an oversize or overweight permit.
Q5: How often should I inspect securement during transport?
Best practice is to check securement shortly after departure once the load has settled, then at regular intervals during the journey. Many operators inspect chains and straps every few hours or at each major stop. Additional inspections should be carried out after hard braking, sharp maneuvers, or rough road sections.
Citations:
1. https://www.bobcat.com/na/en/buying-resources/excavators/how-to-transport-load-compact-mini-excavator
2. https://equipmentsource.net/how-to-transport-a-mini-excavator/
3. https://www.drivingtests.co.nz/resources/how-to-transport-an-excavator/
4. https://www.sanyglobal.com/blog/how-to-load-a-mini-excavator-on-a-trailer/
5. https://nmccat.com/blog/equipment-and-solutions/how-to-transport-mini-excavator/
6. https://blog.rentmas.com/en/transport-a-mini-excavator/
7. https://mechmaxx.com/blogs/news/how-to-transport-a-2700-lbs-mini-excavator-safely
8. https://www.skidsteers.com/blog/how-to-load-a-skid-steer-on-a-trailer/
9. https://freedomheavyhaul.com/best-practices-for-transporting-tracked-loaders-and-skid-steers/
10. https://beardown-logistics.com/blog/safe-transport-excavators-loaders-backhoes/
11. https://www.conger.com/how-to-transport-a-forklift/
12. https://www.catrentalstore.com/en_US/blog/securing-micro-excavators-for-transport.html
13. https://loadlok.com/blogs/news/how-to-safely-transport-construction-equipment
14. https://nzta.govt.nz/roadcode/heavy-vehicle-road-code/the-truck-loading-code/specialised-requirements/construction-equipment
Hot Tags:Mini Excavator Tie Down Requirements,Excavator on Trailer,Compact Mini Excavator Transport, Mini Excavator Transportation, Excavator Transport Tips, How to Transport Mini Excavator, Mini Excavator Loading Guide, Compact Excavator Hauling, Mini Excavator Trailer Loading, Excavator Transport Safety